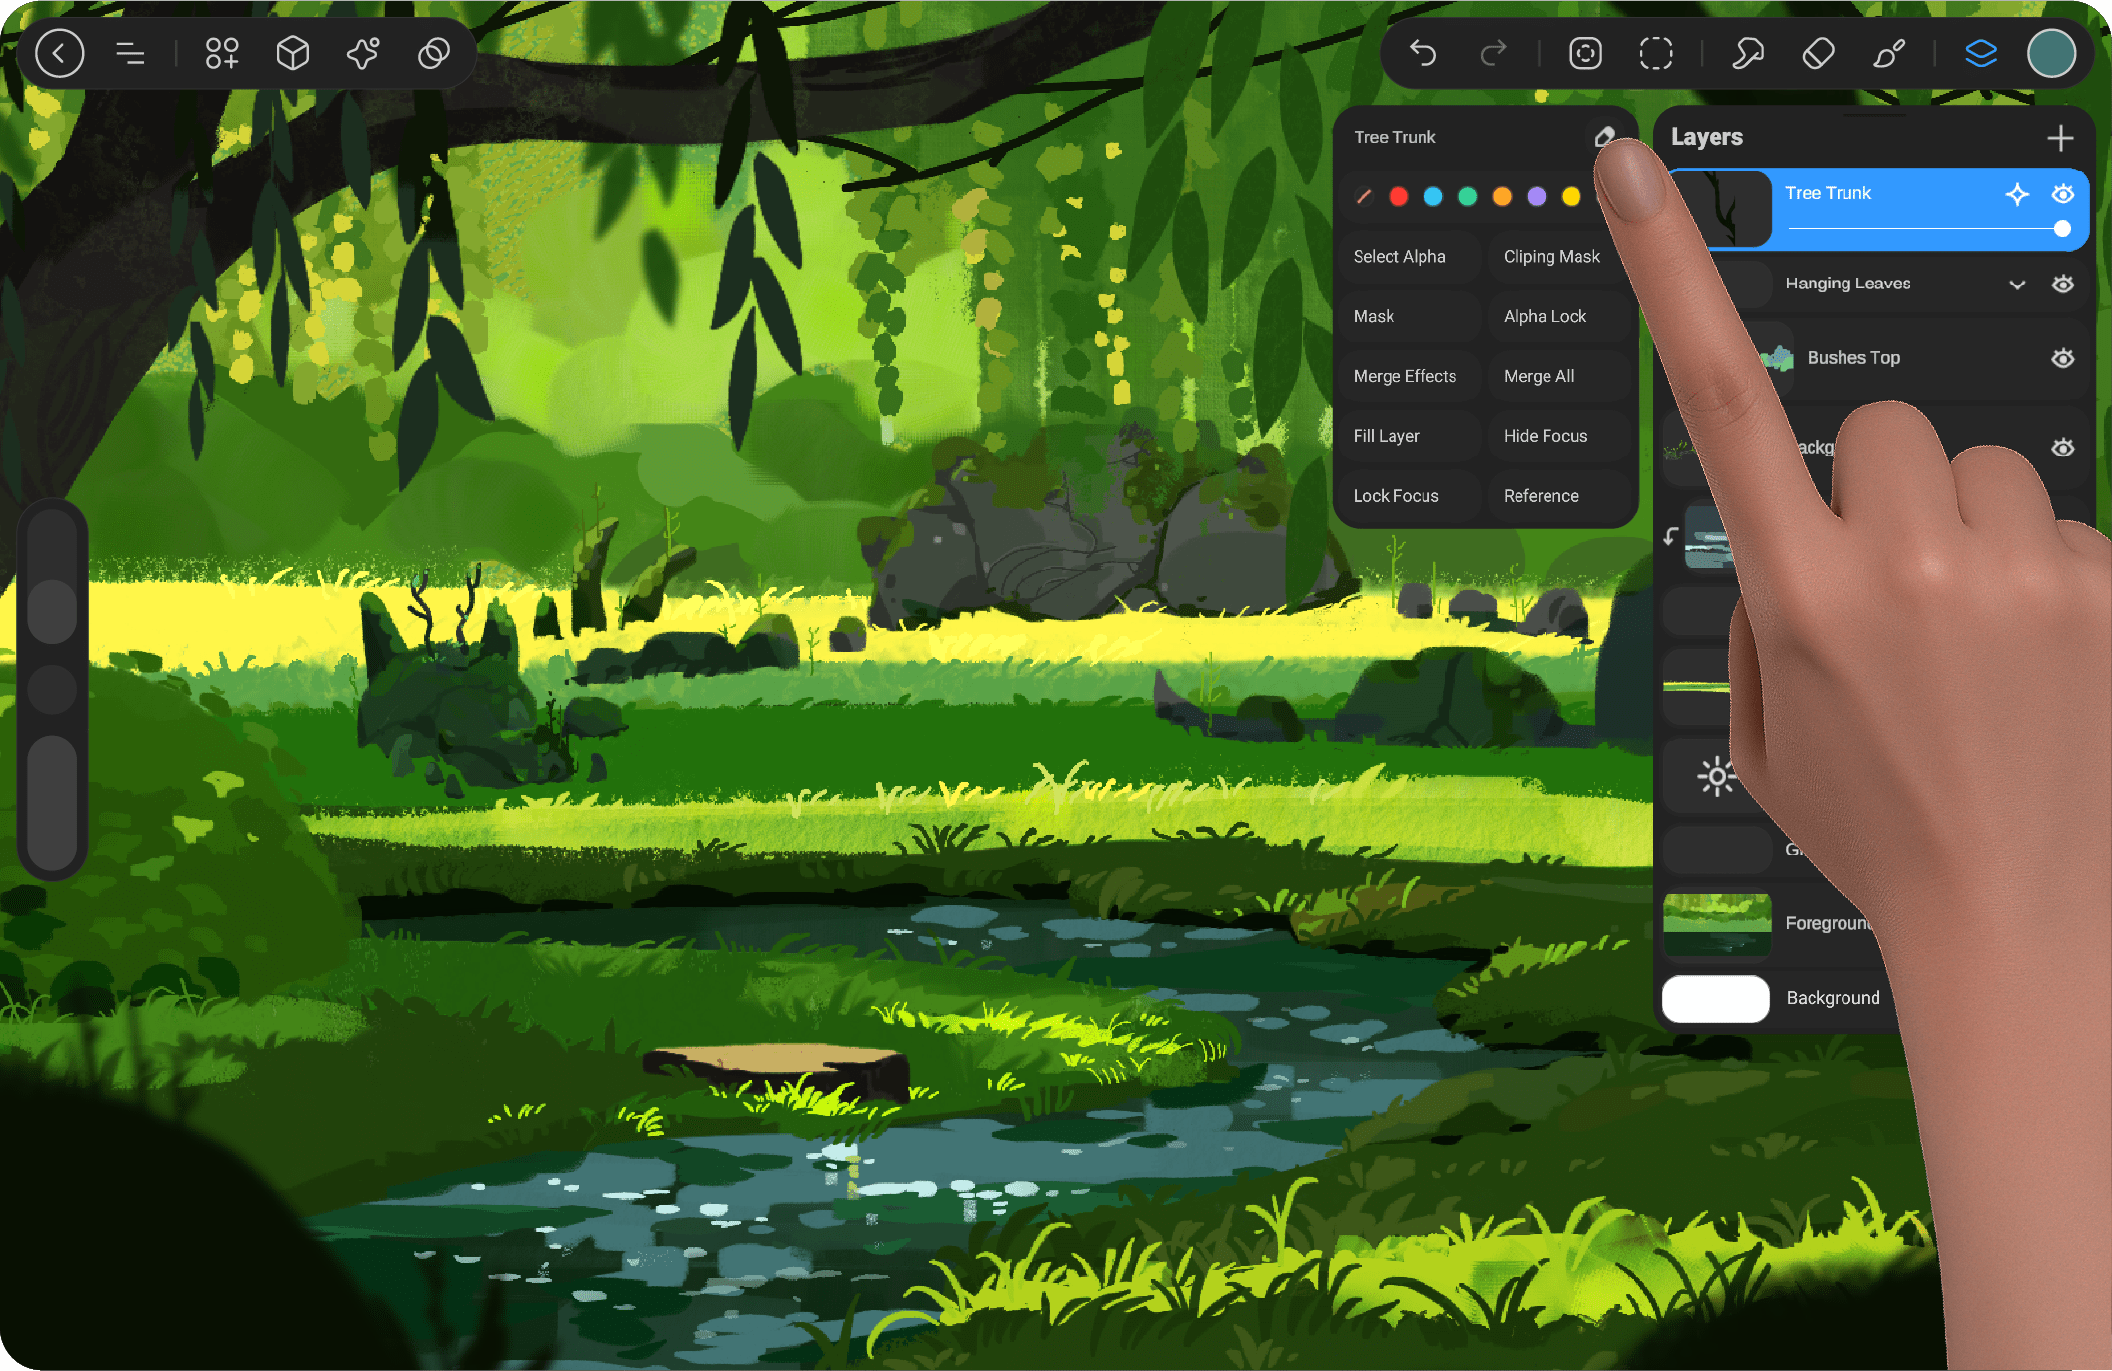
Layer Options Menu #
When you tap once on the Layer Thumbnail, regardless of whether the layer is active or not, the layer settings will appear. This allows you to easily access options like renaming, adjusting opacity, applying blend modes, and more, helping you manage your layers efficiently.
Rename #
Name your layer for better organization. Tap the layer thumbnail and select “Rename” to assign a custom name.
Layer label #
Add a color label to your layer for quick identification. Tap the layer thumbnail and select “Label” to choose a color.
Select Alpha #
Quickly select the contents of a layer with “Select Alpha.” This isolates non-transparent areas for precise edits.
Cliping Mask #
A Clipping Mask is a powerful tool that allows a layer to be visible only where the layer beneath it has content. This is useful for applying textures, shadows, highlights, or patterns without altering the original layer.
How It Works:
When you set a layer as a Clipping Mask, it will only show in the painted areas of the layer directly below it.
Any transparent areas on the lower layer will hide the clipped layer’s content.
The Clipping Mask remains independent, meaning you can edit it without affecting the base layer.
Clipping Mask on Groups:
You can also apply a Clipping Mask to an entire Group, allowing multiple layers inside the group to be masked by the content of the layer below the group.
This makes it easy to create complex effects while keeping your layers organized.
Clipping Masks are perfect for adding depth and details in a non-destructive way, giving you more control over your artwork.
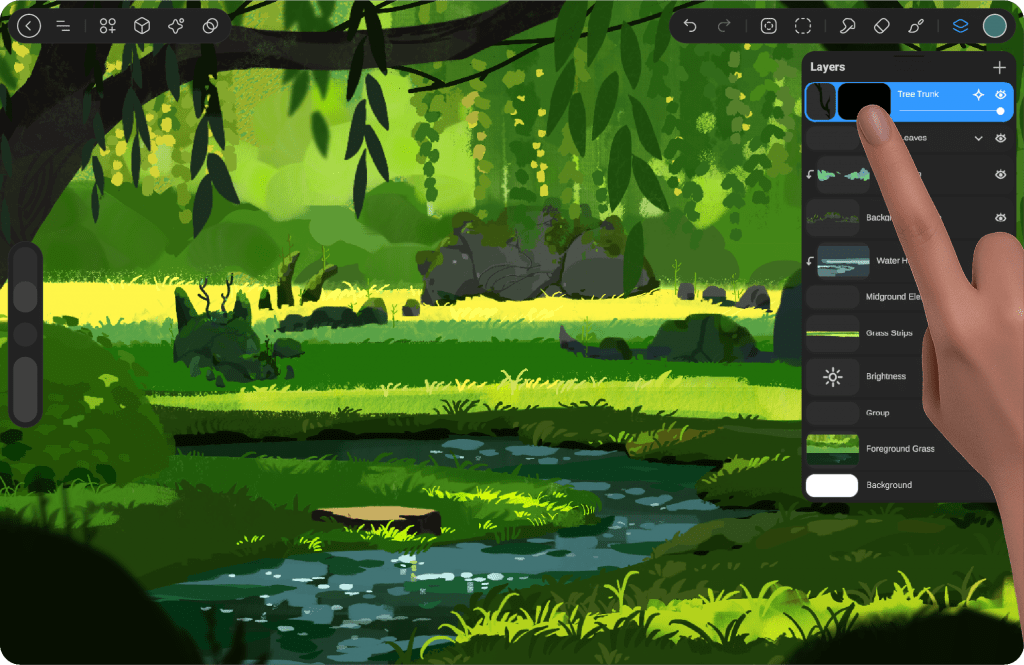
Mask #
A Mask in StylusX allows you to control the visibility of parts of a layer without permanently altering the artwork. It works by hiding or revealing specific areas of a layer based on the mask’s content.
Here’s how it works:
Apply a Mask: You can add a mask to any layer. Once the mask is applied, the layer’s visibility will be controlled by the mask.
Black and White: A mask uses black and white to define visibility. Painting with black on the mask hides parts of the layer, while painting with white reveals those areas. Shades of gray allow for partial transparency.
Editing the Mask: You can edit the mask by painting on it directly, using tools like the brush or eraser. This gives you fine control over what is visible or hidden on the layer.
Using masks is a non-destructive way to work with your artwork, as you can always modify or remove the mask later without altering the original content of the layer.
When the mask is activated, a preview window will appear next to the preview of the layer it is applied to. Tapping on this window will expand it, indicating that it is now the active preview. Once active, the colors will automatically shift to grayscale, ranging from black to white, allowing you to clearly visualize and edit the mask’s effect on the layer.
Mask Options #
Hide: Temporarily hides the mask, making it invisible on the layer without removing it.
Merge With Layer: Combines the mask with the current layer, permanently applying the changes.
Clear: Removes the mask content, but keeps the mask applied to the layer.
Delete: Completely deletes the mask, removing it from the layer entirely
Alpha Lock #
Alpha Lock allows you to paint, erase, or apply effects only within the existing content of a layer, preventing changes to transparent areas.
How It Works:
This is useful for recoloring, shading, or adding details without affecting the overall shape of the layer.
When Alpha Lock is enabled, you can only modify the painted pixels while leaving empty areas untouched.
You can activate it by selecting the Alpha Lock option from the layer menu.
This feature is perfect for making precise edits while keeping your artwork clean and controlled.
When Alpha Lock is activated, an icon will appear at the bottom left corner of the layer preview to indicate that Alpha Lock is enabled for that layer. This helps the user know that only the pixel data within the layer’s content can be edited, and any changes will not affect transparent areas.
Merege Down #
Merge Down combines the selected layer with the one directly below it, merging their contents into a single layer while preserving visual appearance.
Merege All #
Merge All combines all visible layers, including effects, color adjustments, and groups, into a single layer, while preserving the appearance of the artwork. It does not merge hidden or locked layers.
Fill Layer #
The Fill Layer option allows you to fill a layer with a solid color, pattern, or gradient. This is useful for quickly adding a background or base color to your artwork. You can apply it to a single layer or a group of layers, providing flexibility in managing the artwork’s composition.
Hide Focus #
When you enable Hide Focus, all layers will become hidden except for the one you’ve focused on. This allows you to concentrate on a specific part of your artwork without distractions. Tapping again will restore visibility to all layers.
Lock Focus #
When you enable Lock Focus, all layers will remain visible, but only the layer you’ve focused on will be editable. This allows you to work on that specific layer while preventing accidental changes to other layers. Tapping again will unlock the focus and allow you to edit other layers as well.
Reference #
The Reference feature allows you to define a specific layer or area within your artwork as a reference for coloring. When this feature is activated, it restricts the application of fill or color outside the designated reference area, helping you maintain accuracy in your coloring and organization of the artwork.
To set a reference for a layer, enable the Reference option in the layer settings. Once activated, the defined area will act as a boundary for applying fill or color inside it only. This feature is useful for precisely applying colors to specific parts of your artwork.
When Reference is activated, a pin icon will appear to the left of the layer name to indicate that the Reference is enabled on that layer. This helps the user easily identify which layer is being used as a reference for other actions.


