Interface #
The Effects feature in StylusX offers a powerful way to transform and enhance your artwork with a wide variety of adjustments that can add depth, texture, and visual appeal. These effects allow you to create stunning visual changes, whether you want to add subtle adjustments or bold transformations. Whether you’re aiming to create artistic textures, manipulate light and shadow, or apply special visual styles, the Effects panel makes it easy to apply and modify them in real time.
Once an effect is applied, you can fine-tune it with ease, experimenting with various looks until you achieve the desired result. The non-destructive workflow ensures that your original artwork remains intact, allowing you to revert or tweak any effect without losing your progress.
Applying and Managing Effects #
When you select an effect, a panel will appear at the bottom with two options: Canvas or Brush.
Canvas: When this option is selected, the effect will be applied to the entire canvas, affecting all elements within the document.
Brush: When this option is selected, the effect will only affect the areas that are drawn or painted with the brush. The area affected is determined by the mode set in the Canvas mode.
Upon selecting Brush, the colors will automatically shift to grayscale, where white areas show the effect, and black areas hide it. This allows for precise control over where the effect is applied within the painted area.
Additionally, there are two icons to help manage the effects:
Reset Icon: This will reset the effect to its default state.
Eye Icon: Clicking the eye icon will show the original look of the artwork before the effect was applied. By removing the hand icon, the effect will return to its modified state.
Where Will the Effects Appear? #
Once an effect is applied, it will appear above the layer you are working on. A star-shaped icon will appear next to the layer’s visibility (eye) icon. Clicking on this icon will reveal a dropdown menu below the layer, listing all the effects that have been applied to that particular layer. Clicking the icon again will collapse the list of effects.
To delete an effect, simply swipe left on the effect and the trash icon will appear. Clicking on the trash icon will remove the effect from the layer.
Additionally, when an effect is applied to a layer, you will see an extra option in the layer settings called Merge Layer with Effects. This option merges the layer and effects into a single image, eliminating the separation between the layer and the effect.
Once an effect is applied, it can be adjusted at any time, allowing for non-destructive editing. The effect will apply live as you continue to draw or make adjustments on the layer, providing real-time feedback on how your artwork is evolving.
With the ability to apply, tweak, and manage effects, StylusX gives you full creative control over the visual aesthetics of your digital artwork.
Available Effects Settings in StylusX #
StylusX offers a diverse array of Effects that allow you to enhance your artwork in creative and precise ways. The Effects panel gives you the ability to adjust the intensity and behavior of various effects, helping you achieve the exact visual aesthetic you are aiming for.
When you select an effect, a panel will appear at the bottom of the screen, presenting two options: Canvas and Brush, along with the Intensity control. The Intensity slider can be adjusted either by tapping the percentage value and entering a specific number manually or by sliding horizontally if the value is in percentage. For effects involving rotation or axes, the intensity can also be adjusted by a circular slider for better control.
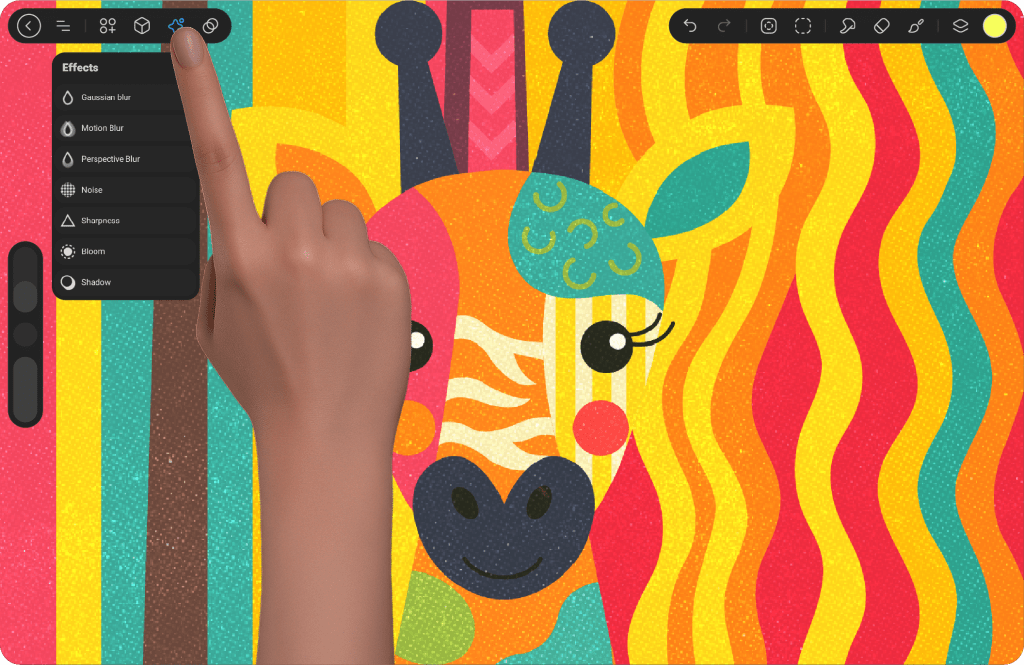
Here’s a breakdown of the available effects in StylusX:
Gaussian Blur #
The Gaussian Blur effect creates a soft, out-of-focus appearance on your artwork. This effect is often used to simulate depth or to smoothen hard edges in the image. It makes the elements of the artwork appear blurry or less defined, creating a gentle transition between pixels.
Intensity: This setting allows you to control the strength of the blur effect. By sliding horizontally, you can increase the intensity of the blur by moving to the right or decrease it by sliding to the left.
Motion Blur #
The Motion Blur effect simulates the visual effect of motion, where fast-moving objects appear as a streak or blur in the direction of movement. This effect is great for creating a sense of speed or dynamic action in your artwork.
Intensity: This adjusts the strength of the motion blur effect, controlling how pronounced the blur appears.
Angle: This controls the direction of the blur. By rotating the slider, you set the angle of the blur, creating different directions of motion blur. The further you move from the center of the slider, the more intense the effect becomes.
Perspective Blur #
The Perspective Blur effect distorts the image in a circular, radial pattern, creating a sense of perspective, like looking through a fisheye lens. This effect gives depth and an exaggerated perspective shift to your artwork, enhancing the visual experience.
Intensity: This adjusts the strength of the effect, increasing or decreasing the distortion.
Focus Point: A circular indicator appears on the screen that allows you to set the focal point of the perspective shift. You can drag the indicator to determine where the focus should be, and by sliding horizontally, you control the strength of the effect.
Noise #
The Noise effect adds random noise particles to your artwork, which can simulate grainy textures or create an imperfect, vintage look. Noise can enhance realism by adding texture or create artistic effects that give your artwork more character.
Intensity: This adjusts the overall strength of the noise effect, controlling how prominent the noise appears in your artwork.
Multi/Single: These two options allow you to control the type of noise applied. “Single” applies a consistent noise pattern, while “Multi” introduces varied noise across the layer, adding a more complex texture.
Scale: The slider controls the size and distribution of the noise particles, allowing for subtle or intense effects based on your artistic needs.
Sharpness #
The Sharpness effect enhances the fine details in your artwork by emphasizing the contrast between adjacent pixels. It is commonly used to make the image appear clearer and more defined, bringing out textures and intricate details.
Intensity: Controls how sharp or soft the image appears. By adjusting this slider, you can enhance or reduce the sharpness of the image. The further you move the slider, the more pronounced the sharpness effect becomes.
Bloom #
The Bloom effect creates a glowing aura around bright areas of the image, simulating the light that spills over from high-intensity sources. This effect is perfect for enhancing lighting, giving a soft, ethereal glow to your artwork.
Intensity: This adjusts the strength of the bloom effect, giving your artwork a glowing, ethereal quality. The higher the intensity, the more intense the bloom effect becomes.
Size: Controls the size of the bloom effect, determining how much of the image is affected by the glow.
Light Range: This setting adjusts the range of light intensity for the bloom, affecting how far the light spreads across the image.
Burn: This controls the strength of the light in the bloom, allowing you to fine-tune the luminosity.
Shadow #
The Shadow effect simulates the presence of a light source and the resulting shadows cast by objects in your artwork. This effect is ideal for adding depth and creating a more realistic or dramatic lighting effect.
X-Axis and Y-Axis: These sliders control the horizontal and vertical placement of the shadow in pixels. By dragging the sliders, you can adjust the position of the shadow in both directions, creating a natural or exaggerated shadow effect.
Opacity: Adjusts the transparency of the shadow. The lower the opacity, the more subtle the shadow becomes, while higher opacity creates darker, more pronounced shadows.
Blur: Controls the softness of the shadow’s edges. Increasing the blur will make the shadow appear softer and more diffused, while reducing it will give the shadow more defined edges.


