Interface #
Upon clicking Create, a new interface will open featuring a panel at the bottom with multiple options:
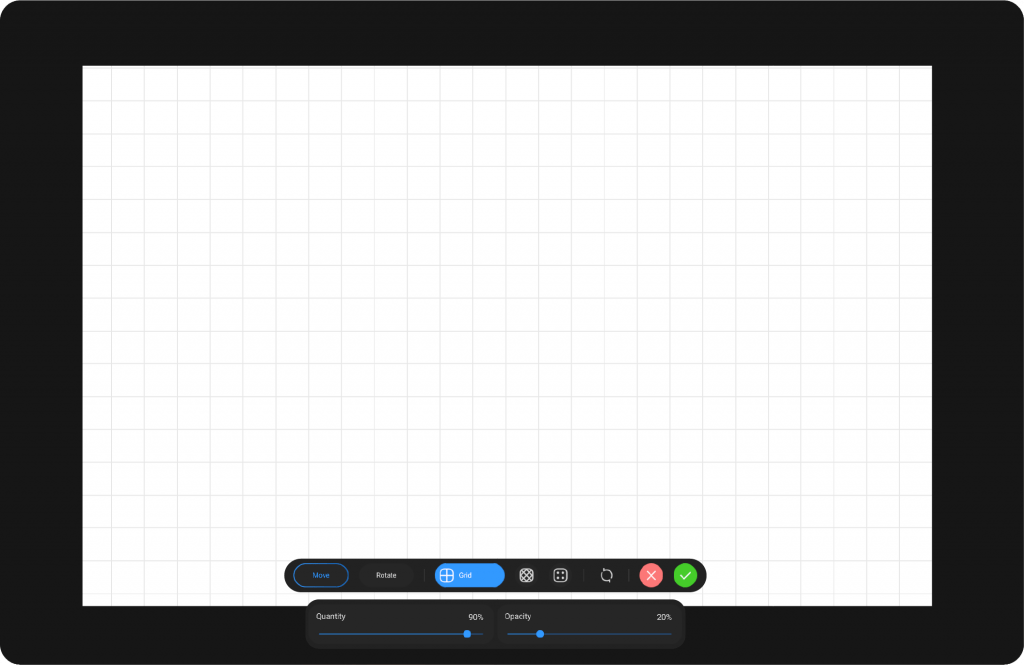
Grid Settings #
From left to right:
Move: This option allows you to move the lines horizontally and vertically.
Rotate: This option enables you to rotate the lines.
Grid: The first option under the grid mode, it provides horizontal and vertical lines.
Isometric: This mode applies an isometric grid, which is a method of visual representation where all three axes (X, Y, and Z) are drawn at equal angles (typically 30°), creating a 3D-like effect in a 2D plane.
Points: This option allows you to use points for more precise control over your lines.
Apply – Save the current setup and continue working.
Reset – Revert changes to default settings.
Exit – Discard changes and close the 3D Assistant.
At the bottom of the panel, there are two sliders:
Quantity: Controls the number of lines in the grid.
Opacity: Controls the transparency of the lines.After Apply Settings:
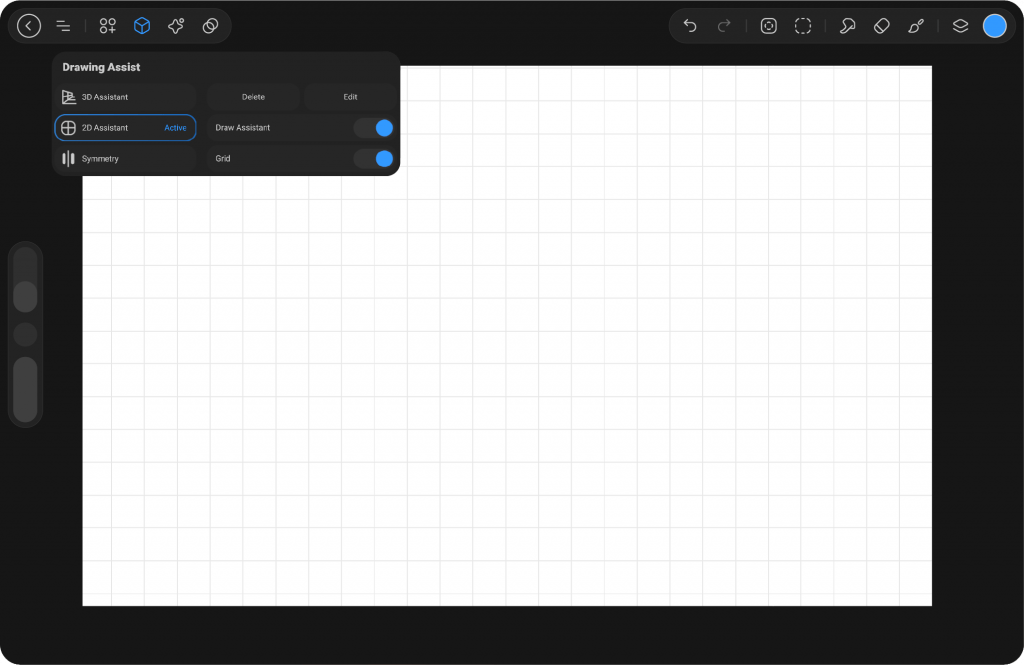
After Apply Settings #
When you activate the 2D Assistant, a perspective grid is generated on the canvas to help you draw with accurate alignment in two-dimensional space. After applying the settings, additional options appear in the main Drawing Assist menu. Delete removes the active 2D Assistant, while Edit reopens its settings so you can refine the grid configuration.
Below these options, you will find two switches that control the assistant’s behavior. Draw Assistant makes your strokes automatically follow the perspective grid, giving your lines consistent alignment. Grid toggles the visibility of the grid, allowing you to show or hide it depending on your workflow.


