Interface #
When you activate the 3D Assistant, a dedicated interface appears to help you manage the 3D environment and perspective grids.
Top Bar Controls (from left to right) #
Camera – Allows you to freely navigate the 3D space in 360°.
Canvas – Adjusts the position of the canvas within the 3D environment.
Lock – Locks the camera to prevent accidental movement.
Reset – Restores the camera to its default position.
Save – Saves the current camera angle as the reset point for quick access later.
Camera Navigator #
Below the top bar, you’ll find the Camera Navigator, which lets you move the camera smoothly in all directions: up, down, left, right, forward, and backward.
Mouse Control:
Left Click: Moves the camera horizontally and vertically across the canvas.
Scroll Wheel: Zooms in or out of the canvas.
Right Click + Drag: Rotates the camera to adjust the perspective angle.
Touch Control:
Two-finger Swipe: Moves the camera horizontally and vertically.
One-finger Swipe: Rotates the camera.
Pinch: Zooms in or out by pinching the screen with two fingers.
Stylus Control:
Using the Canvas Pilot, you can navigate the 3D camera with intuitive controls. Move the joystick to shift the camera’s position, rotate around the ring to zoom in and out, and simply press and drag on the camera icon with your stylus or mouse to orbit within the 3D environment.
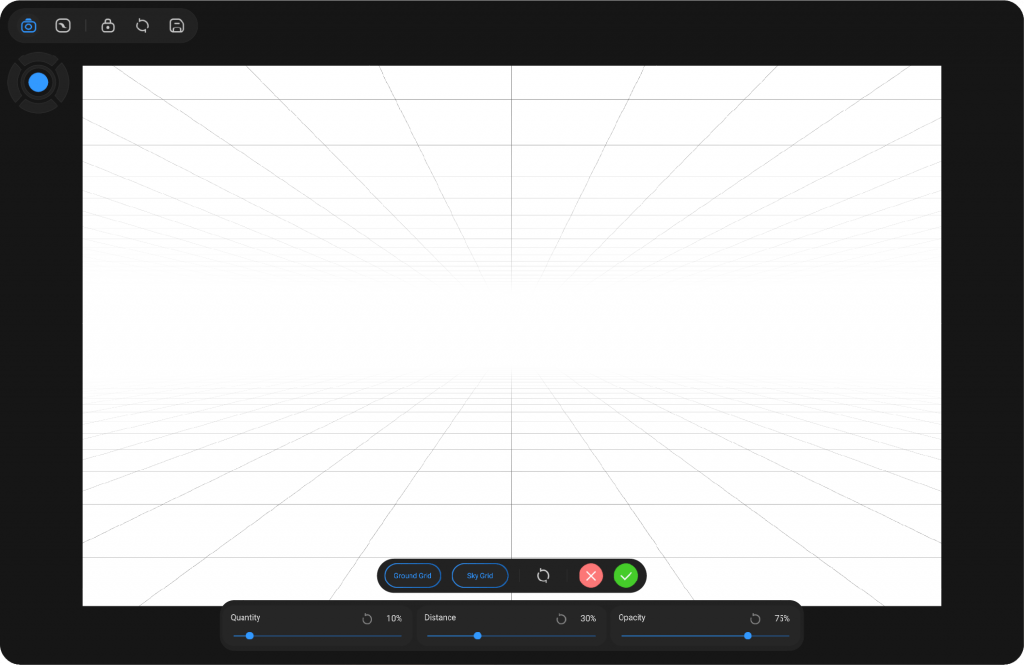
Grid Options #
At the bottom of the interface, you can enable or disable grids:
- Ground Grid – Displays a perspective grid on the ground.
- Sky Grid – Displays a perspective grid above the horizon.
Additionally, you can:
Apply – Save the current setup and continue working.
Reset – Revert changes to default settings.
Exit – Discard changes and close the 3D Assistant.
Sliders #
At the bottom, three sliders provide fine control:
Opacity – Changes the visibility (transparency) of the grid lines.
Quantity – Adjusts the density of the grid lines.
Distance – Controls the spacing between the ground and sky grids.
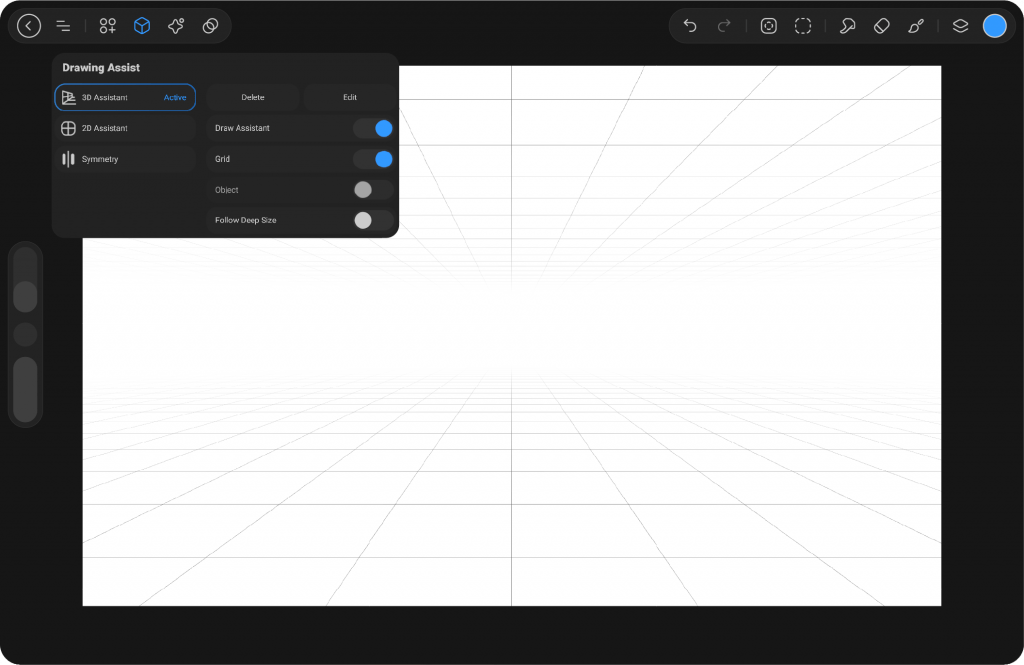
After Apply Settings #
Once the 3D Assistant settings are applied, additional options will appear on the left side of the main Drawing Assist menu. You will see Delete, which removes the active 3D Assistant, and Edit, which reopens the 3D Assistant settings so you can adjust or refine your configuration.
Beneath these options, there are four switches that customize how the 3D Assistant behaves. Draw Assistant enables the assistant to guide your strokes so they follow the perspective grid. Grid controls the visibility of the perspective grid, allowing you to toggle it on or off. Object allows the assistant to interact with objects placed in the scene, aligning strokes relative to them. Follow Deep Size automatically adjusts line thickness and scale based on depth, creating a more natural sense of distance.


